Craft Adorable Snowman Peanut Butter Balls: Your Ultimate Guide to Festive Fun
As the holiday season twinkles into view, visions of festive treats dance in our heads. And when it comes to combining irresistible flavor with undeniable charm, few confections capture the spirit quite like snowman peanut butter balls. Imagine a delicious bite of classic peanut butter goodness, transformed into an adorable, edible snowman that brings smiles to every face. These delightful creations are more than just a dessert; they’re a joyful holiday tradition waiting to happen, offering a perfect blend of sweetness, texture, and creative fun.
Whether you're looking for a simple yet impressive treat for your next gathering, a delightful activity to do with kids, or a unique gift from the kitchen, these festive little snowmen fit the bill. Their inherent cuteness makes them a standout on any dessert table, and their beloved flavor ensures they won't last long! Let's dive into how you can craft these super cute and delicious easy snowman peanut butter balls, transforming simple ingredients into holiday magic.
The Heart of the Snowman: Irresistible Ingredients & How They Work
The magic of snowman peanut butter balls lies in their simplicity. With just a handful of common pantry staples, you can create a treat that tastes far more complex than its ingredient list suggests. The core appeal is, of course, that beloved peanut butter flavor, perfectly balanced and given an intriguing texture.
The Dynamic Duo: Peanut Butter & Graham Crackers
- Creamy Peanut Butter: This is the undeniable star of the show, providing that rich, comforting, and familiar taste everyone loves. For the best results and a smooth, cohesive dough, opt for creamy peanut butter – brands like Skippy or Jif are excellent choices due to their consistent texture and oil content. While natural peanut butter can be used, be mindful that its oil separation might require extra mixing and careful adjustment to prevent a greasy or crumbly dough. The peanut butter acts as the primary binder and flavor base.
- Graham Crackers: Beyond just holding everything together, crumbled graham crackers bring a wonderful texture to the peanut butter balls. They add a subtle sweetness and a fine, sandy crunch that contrasts beautifully with the creamy peanut butter. This often-underestimated ingredient is crucial for achieving that classic peanut butter ball consistency that isn't too soft or too firm. It’s the secret behind the delightful bite of these graham cracker & peanut butter snowmen.
The Supporting Cast: Sweetness and Structure
Alongside the main stars, a few other ingredients ensure your snowman peanut butter balls reach their full delicious potential:
- Powdered Sugar (Confectioners' Sugar): This provides the necessary sweetness and helps to thicken the dough, giving it a smooth, moldable texture without being gritty.
- Butter or Margarine: A small amount of melted butter or margarine adds richness, moisture, and helps bind the mixture, contributing to that melt-in-your-mouth quality.
- Vanilla Extract (Optional but Recommended): A dash of vanilla elevates the flavor profile, adding warmth and depth to the peanut butter.
- Shredded Coconut: This is the classic "snow" coating, providing both a lovely texture and a beautiful, snowy white appearance that makes your snowmen truly shine. If coconut isn't a favorite, don't worry – we'll explore alternatives!
Crafting Your Dough: From Crumbles to Chill
Making the base for your snowman peanut butter balls is surprisingly straightforward and can even be a fun, stress-relieving activity.
The Crushing & Mixing Process
- Crush Those Crackers: First, you’ll need finely crumbled graham crackers. You can achieve this in a few ways:
- Food Processor: For speed and uniformity, a food processor is your best friend. Pulse the graham crackers a few times until they reach a fine crumb consistency.
- Manual Method (Therapeutic!): If you’re looking to work out some holiday stress, grab a potato masher, a rolling pin, or even just your hands, place the graham crackers in a sturdy bowl or a Ziploc bag, and go to town! Crushing them manually can be surprisingly satisfying and ensures a slightly varied texture that some prefer.
- Combine Dry Ingredients: In a large bowl, mix your finely crumbled graham crackers with the powdered sugar until well combined.
- Prepare Wet Mixture: In a separate, microwave-safe bowl, gently melt your peanut butter and butter (or margarine) together. You can do this in the microwave in short bursts, stirring frequently, or in a saucepan over low heat. Once melted and smooth, stir in the vanilla extract, if using.
- Bring It All Together: Pour the warm peanut butter mixture into the bowl with the graham cracker and sugar mixture. Mix thoroughly until all ingredients are fully combined and you have a cohesive, slightly sticky dough. Ensure there are no dry spots.
The Crucial Chill
Once your dough is mixed, don't skip this vital step: chilling. Transfer the entire mixture to the refrigerator for at least 3 hours. This chilling period is absolutely crucial as it allows the fats in the peanut butter and butter to firm up, making the dough much easier to handle and roll into perfect balls. Without adequate chilling, your dough will be too soft and sticky, making the rolling process a messy and frustrating experience. If you’re short on time, you can place it in the freezer for about an hour, but keep a close eye on it to prevent it from freezing solid.
Bringing Your Snowmen to Life: Rolling, Stacking & Creative Customization
This is where the real fun begins – transforming your chilled dough into charming, edible snowmen!
Rolling and Coating Your Snowballs
- Roll the Balls: Once the dough is firmly chilled, scoop out small portions (about 1-inch in diameter) and roll them into smooth, compact balls. For uniformity, you can use a small cookie scoop. The dough should be pliable but not sticky.
- Coat in Coconut: Gently roll each peanut butter ball in shredded coconut. Press lightly to ensure the coconut adheres well, creating that iconic "snowball" effect. If you're not a fan of coconut, consider rolling them in finely crushed white chocolate, powdered sugar, or even clear sanding sugar for a glistening snow look.
Assembling Your Snowmen
To create your snowmen, you'll typically stack three balls. For stability, you might want to use a tiny dab of melted white chocolate or a bit of icing between each ball to "glue" them together. If your balls are slightly different sizes, try stacking them largest on the bottom, medium in the middle, and smallest on top for a classic snowman silhouette.
Personalizing Your Snowmen: Creative Decoration Ideas
Here's where your artistic flair can truly shine! Decorating your snowman peanut butter balls allows for endless creativity and makes each one unique. While leaving them plain is an option, adding those adorable details truly brings them to life.
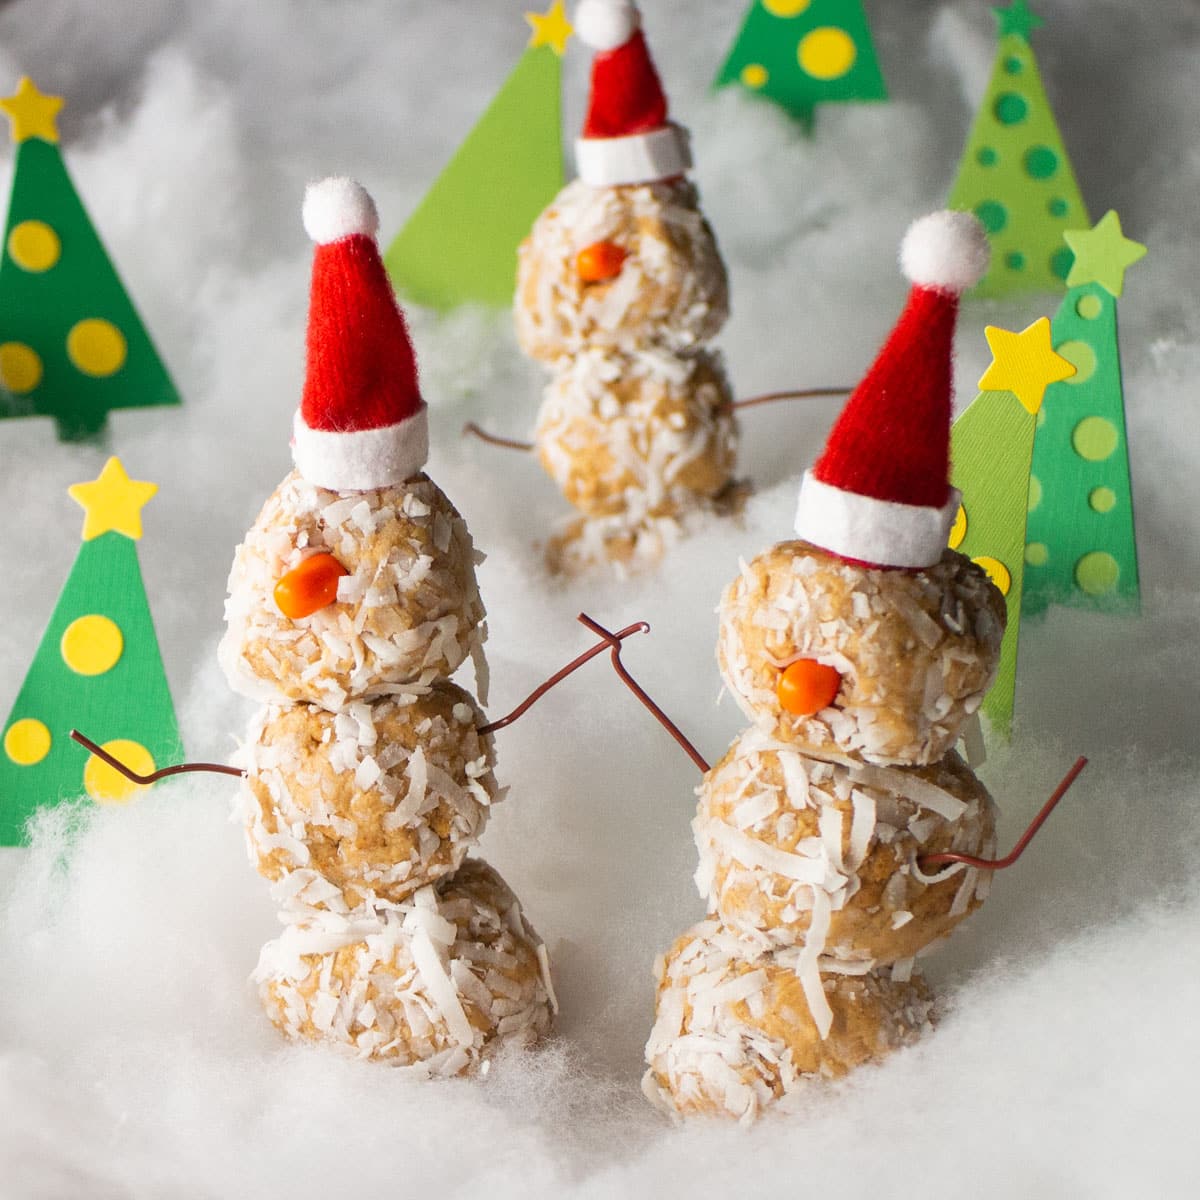
- Noses: The classic choice is an orange Tic Tac for a perfectly pointed carrot nose. Alternatively, use a tiny sliver of dried apricot, an orange sprinkle, or even a small dot of orange icing applied with a toothpick.
- Arms: For rustic charm, small, thin pretzel sticks make excellent edible twig arms. You could also use tiny chocolate sprinkles, thin slivers of almonds, or even small pieces of grape stems (if for decorative purposes only).
- Hats: Mini Santa hats are incredibly festive and easy to find in craft stores around the holidays. For edible hats, consider:
- Turning a mini Reese's peanut butter cup upside down.
- Using a mini chocolate chip, pointy side up, for a tiny top hat.
- Melting a small amount of chocolate or candy melts and piping a simple hat shape.
- Cutting small shapes from fruit leather or gumdrops.
- Eyes and Mouths:
- Eyes: Use mini chocolate chips (flat side down), tiny black sprinkles, edible googly eyes, or simply dot with a black edible marker or black icing.
- Mouths: A row of small black sprinkles, a curved line drawn with an edible marker, or even a tiny piece of red fruit leather for a smile.
- Scarves: A thin strip of fruit leather or a tiny piped line of colored icing can make a lovely scarf.
- Buttons: Small colorful sprinkles or tiny chocolate chips can be placed down the snowman's "front."
Beyond Snowmen: Alternative Designs and Dipped Delights
If you're making a big batch or simply want variety, you don't have to make every ball into a snowman. These peanut butter balls are incredibly versatile:
- Classic Peanut Butter Balls: Simply roll them in shredded coconut for a straightforward, delicious treat.
- Chocolate-Dipped Delights: Melt chocolate chips with a touch of shortening for a smooth dipping consistency, or use candy melts (which require no shortening). Dip half or the entire ball in melted semi-sweet, milk, or white chocolate. Before the chocolate sets, roll them in holiday sprinkles, crushed peppermint, or more shredded coconut for an extra layer of flavor and festivity. For a truly superior chocolate experience, consider using high-quality chocolate like Callebaut, as its richness can significantly elevate a simple dessert.
These variations are perfect for adding different textures and flavors to your holiday platter, or for those who simply prefer a simpler presentation.
Storing Your Sweet Creations: Keeping Them Fresh & Festive
One of the best things about snowman peanut butter balls is their excellent shelf life, making them perfect for preparing in advance or gifting.
- Refrigeration: Store your peanut butter balls in an airtight container in the refrigerator for up to 7 days. The cold helps maintain their firm texture and freshness.
- Freezing: For longer storage, these treats freeze beautifully! Place them in a single layer on a baking sheet to freeze solid, then transfer them to a freezer-safe, airtight container or bag. They can be stored in the freezer for up to 2 months. To enjoy, simply thaw them in the refrigerator for a few hours or at room temperature for about 30-60 minutes.
Proper storage ensures your delightful snowmen remain delicious for days, ready to be enjoyed or shared.
Tips for Success and Holiday Fun
- Involve the Family: This recipe is fantastic for getting kids involved in holiday baking. They can help crush graham crackers, roll balls, and especially enjoy decorating their own snowmen.
- Gifting: Pack your finished snowman peanut butter balls in decorative tins or cellophane bags with festive ribbons for a charming homemade gift that friends, teachers, and neighbors will adore.
- Presentation Matters: Arrange your snowmen on a platter with other holiday treats. They look especially enchanting when placed around a gingerbread house or a festive scene, as if they’ve just come to life in a winter wonderland. A simple backdrop of "snow" (powdered sugar or coconut) can enhance the display.
- Double the Recipe: These disappear quickly! If you’re making them for a party or to give as gifts, consider doubling the recipe.
There's something truly magical about these snowman peanut butter balls. They're not just a treat; they're a miniature celebration of the season, bringing warmth, nostalgia, and a touch of whimsy to your holiday table. Easy to make, incredibly delicious, and endlessly customizable, they embody everything wonderful about festive baking. So gather your ingredients, unleash your creativity, and get ready to craft some adorable snowmen that taste as good as they look. Happy holidays, and happy baking!
